Using Automations for Dynamic Responses
From the Automations concept page, we saw what an automation can do and how to configure one within the UI.
In this guide, we will showcase the following common use cases:
- Create a simple notification automation in just a few UI clicks
- Build upon an event based automation
- Combine into a multi-layered responsive deployment pattern
Available only on Prefect Cloud
Automations are a Prefect Cloud feature.
Prerequisites
Please have the following before exploring the guide:
- Python installed
- Prefect installed (follow the installation guide)
- Authenticated to a Prefect Cloud workspace
- A work pool set up to handle the deployments
Creating the example script
Automations allow you to take actions in response to triggering events recorded by Prefect.
For example, let's try to grab data from an API and send a notification based on the end state.
We can start by pulling hypothetical user data from an endpoint and then performing data cleaning and transformations.
Let's create a simple extract method, that pulls the data from a random user data generator endpoint.
from prefect import flow, task, get_run_logger
import requests
import json

@task
def fetch(url: str):
    logger = get_run_logger()
    response = requests.get(url)
    raw_data = response.json()
    logger.info(f"Raw response: {raw_data}")
    return raw_data

@task
def clean(raw_data: dict):
    print(raw_data.get('results')[0])
    results = raw_data.get('results')[0]
    logger = get_run_logger()
    logger.info(f"Cleaned results: {results}")
    return results['name']

@flow
def build_names(num: int = 10):
    df = []
    url = "https://randomuser.me/api/"
    logger = get_run_logger()
    copy = num
    while num != 0:
        raw_data = fetch(url)
        df.append(clean(raw_data))
        num -= 1
    logger.info(f"Built {copy} names: {df}")
    return df

if __name__ == "__main__":
    list_of_names = build_names()
The data cleaning workflow has visibility into each step, and we are sending a list of names to our next step of our pipeline.
Create notification block within the UI
Now let's try to send a notification based off a completed state outcome. We can configure a notification to be sent so that we know when to look into our workflow logic.
-
Prior to creating the automation, let's confirm the notification location. We have to create a notification block to help define where the notification will be sent.
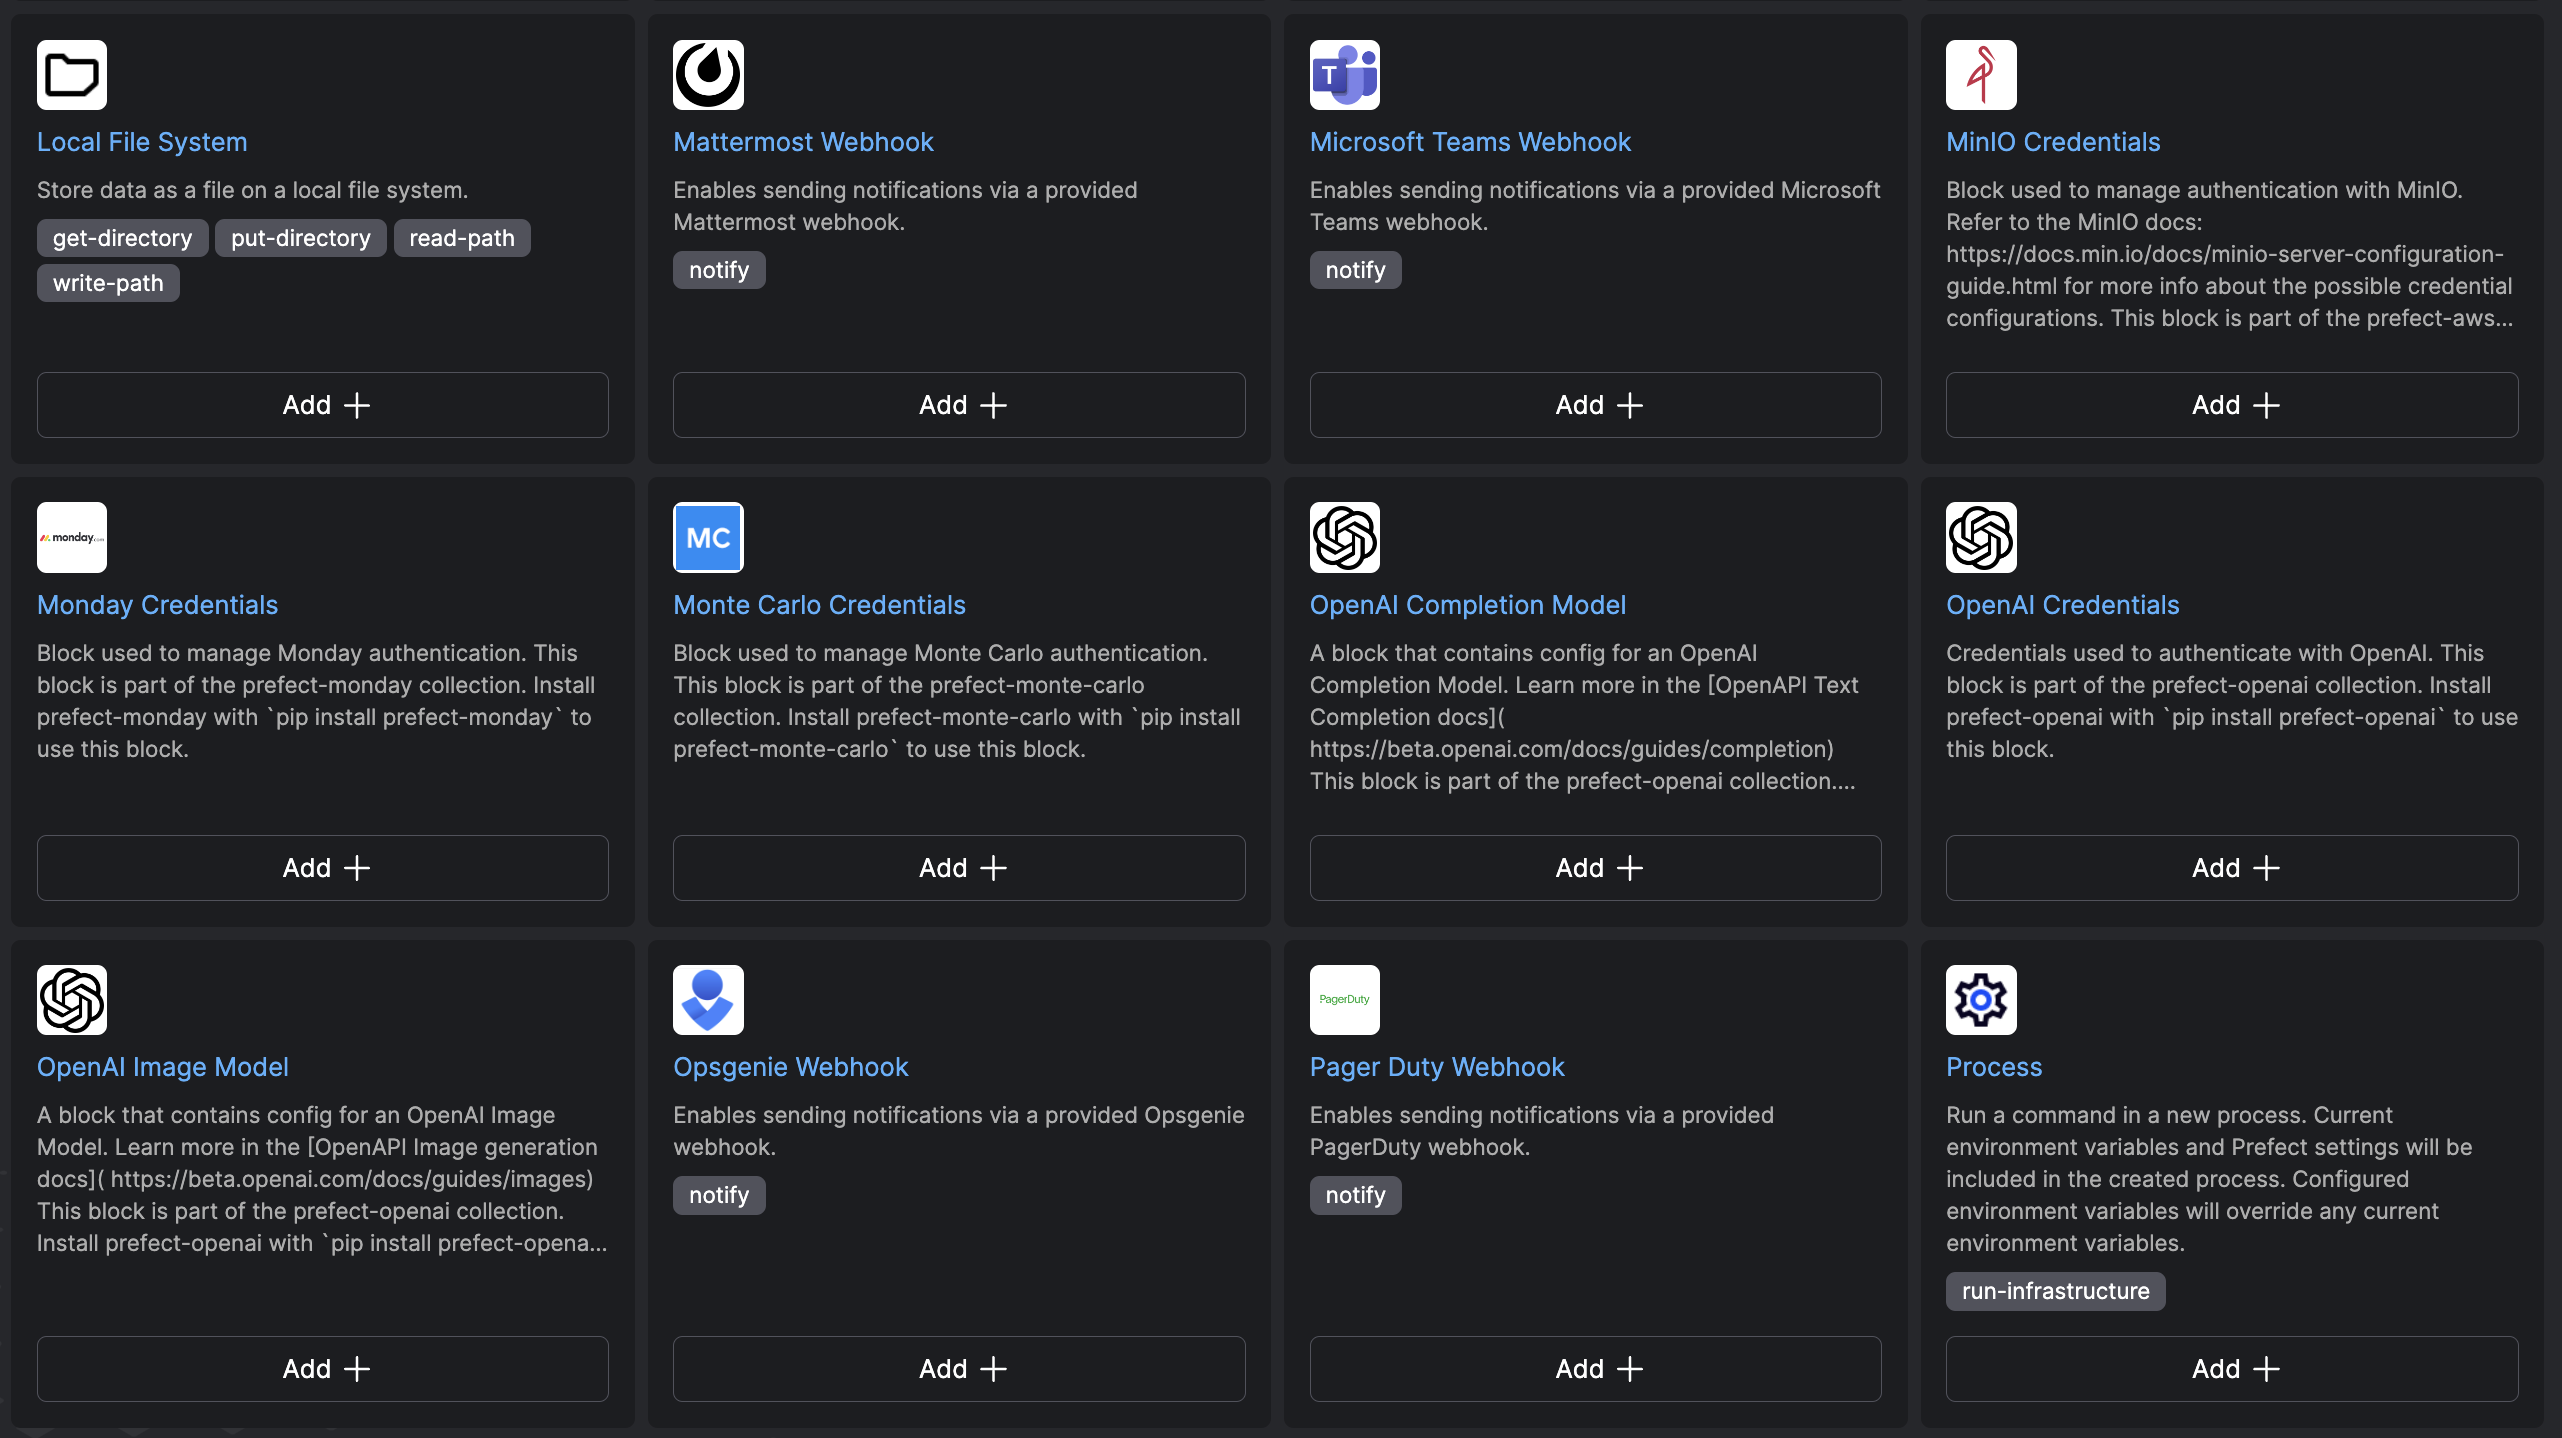
-
Let's navigate to the blocks page on the UI, and click into creating an email notification block.
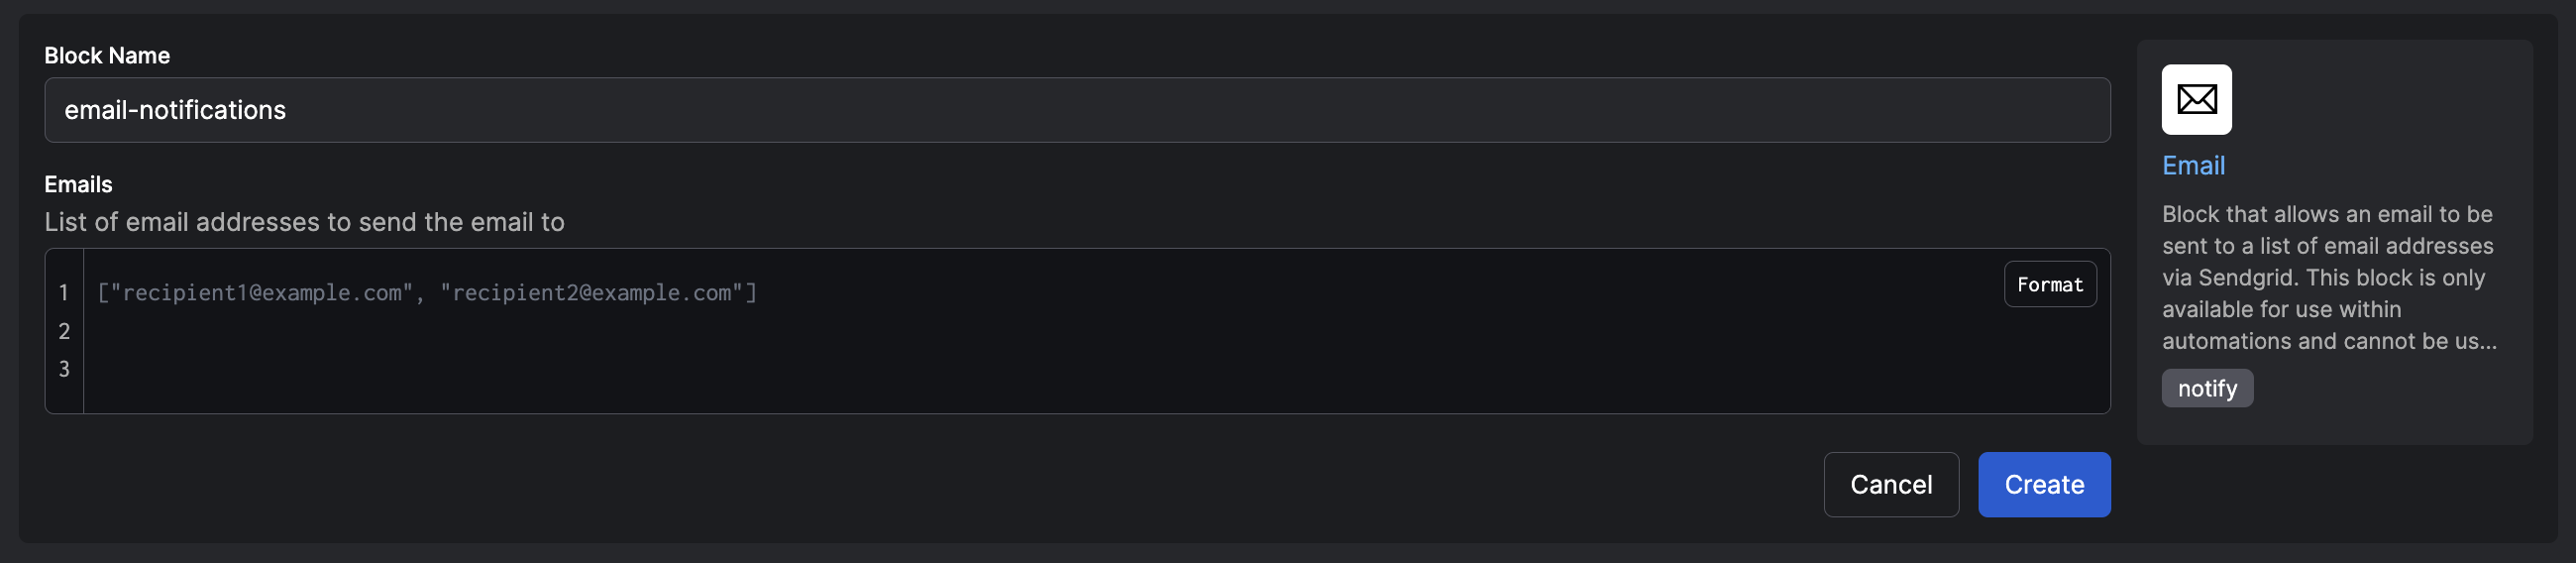
-
Now that we created a notification block, we can go to the automations page to create our first automation.

-
Next we try to find the trigger type, in this case let's use a flow completion.

-
Finally, let's create the actions that will be done once the triggered is hit. In this case, let's create a notification to be sent out to showcase the completion.

-
Now the automation is ready to be triggered from a flow run completion. Let's run the file locally and see that the notification is sent to our inbox after the completion. It may take a few minutes for the notification to arrive.

No deployment created
Keep in mind, we did not need to create a deployment to trigger our automation, where a state outcome of a local flow run helped trigger this notification block. We are not required to create a deployment to trigger a notification.
Now that you've seen how to create an email notification from a flow run completion, let's see how we can kick off a deployment run in response to an event.
Event-based deployment automation
We can create an automation that can kick off a deployment instead of a notification. Let's explore how we can programmatically create this automation. We will take advantage of Prefect's REST API to help create this automation.
See the REST API documentation as a reference for interacting with the Prefect Cloud automation endpoints.
Let's create a deployment where we can kick off some work based on how long a flow is running. For example, if the build_names flow is taking too long to execute, we can kick off a deployment of the with the same build_names flow, but replace the count value with a lower number - to speed up completion.
You can create a deployment with a prefect.yaml file or a Python file that uses flow.deploy.
Create a prefect.yaml file like this one for our flow build_names:
  # Welcome to your prefect.yaml file! You can use this file for storing and managing
  # configuration for deploying your flows. We recommend committing this file to source
  # control along with your flow code.

  # Generic metadata about this project
  name: automations-guide
  prefect-version: 2.13.1

  # build section allows you to manage and build docker images
  build: null

  # push section allows you to manage if and how this project is uploaded to remote locations
  push: null

  # pull section allows you to provide instructions for cloning this project in remote locations
  pull:
  - prefect.deployments.steps.set_working_directory:
      directory: /Users/src/prefect/Playground/automations-guide

  # the deployments section allows you to provide configuration for deploying flows
  deployments:
  - name: deploy-build-names
    version: null
    tags: []
    description: null
    entrypoint: test-automations.py:build_names
    parameters: {}
    work_pool:
      name: tutorial-process-pool
      work_queue_name: null
      job_variables: {}
    schedule: null
To follow a more Python based approach to create a deployment, you can use flow.deploy as in the example below.
# .deploy only needs a name, valid work pool
# and a reference to where the flow code exists

if __name__ == "__main__":
build_names.deploy(
    name="deploy-build-names",
    work_pool_name="tutorial-process-pool"
    image="my_registry/my_image:my_image_tag",
)
Now let's grab our deployment_id from this deployment, and embed it in our automation. There are many ways to obtain the deployment_id, but the CLI is a quick way to see all of your deployment ids.
Find deployment_id from the CLI
The quickest way to see the ID's associated with your deployment would be running prefect deployment ls
in an authenticated command prompt, and you will be able to see the id's associated with all of your deployments
prefect deployment ls
                                          Deployments
┏━━━━━━━━━━━━━━━━━━━━━━━━━━━━━━━━━━━━━━━━━━━━━━━━━━━━━━━┳━━━━━━━━━━━━━━━━━━━━━━━━━━━━━━━━━━━━━━┓
┃ Name                                                  ┃ ID                                   ┃
┡━━━━━━━━━━━━━━━━━━━━━━━━━━━━━━━━━━━━━━━━━━━━━━━━━━━━━━━╇━━━━━━━━━━━━━━━━━━━━━━━━━━━━━━━━━━━━━━┩
│ Extract islands/island-schedule                       │ d9d7289c-7a41-436d-8313-80a044e61532 │
│ build-names/deploy-build-names                        │ 8b10a65e-89ef-4c19-9065-eec5c50242f4 │
│ ride-duration-prediction-backfill/backfill-deployment │ 76dc6581-1773-45c5-a291-7f864d064c57 │
└───────────────────────────────────────────────────────┴──────────────────────────────────────┘
api_key, account_id, and workspace_id.
def create_event_driven_automation():
    api_url = f"https://api.prefect.cloud/api/accounts/{account_id}/workspaces/{workspace_id}/automations/"
    data = {
    "name": "Event Driven Redeploy",
    "description": "Programmatically created an automation to redeploy a flow based on an event",
    "enabled": "true",
    "trigger": {
    "after": [
        "string"
    ],
    "expect": [
        "prefect.flow-run.Running"
    ],
    "for_each": [
        "prefect.resource.id"
    ],
    "posture": "Proactive",
    "threshold": 30,
    "within": 0
    },
    "actions": [
    {
        "type": "run-deployment",
        "source": "selected",
        "deployment_id": "YOUR-DEPLOYMENT-ID",
        "parameters": "10"
    }
    ],
    "owner_resource": "string"
        }

    headers = {"Authorization": f"Bearer {PREFECT_API_KEY}"}
    response = requests.post(api_url, headers=headers, json=data)

    print(response.json())
    return response.json()
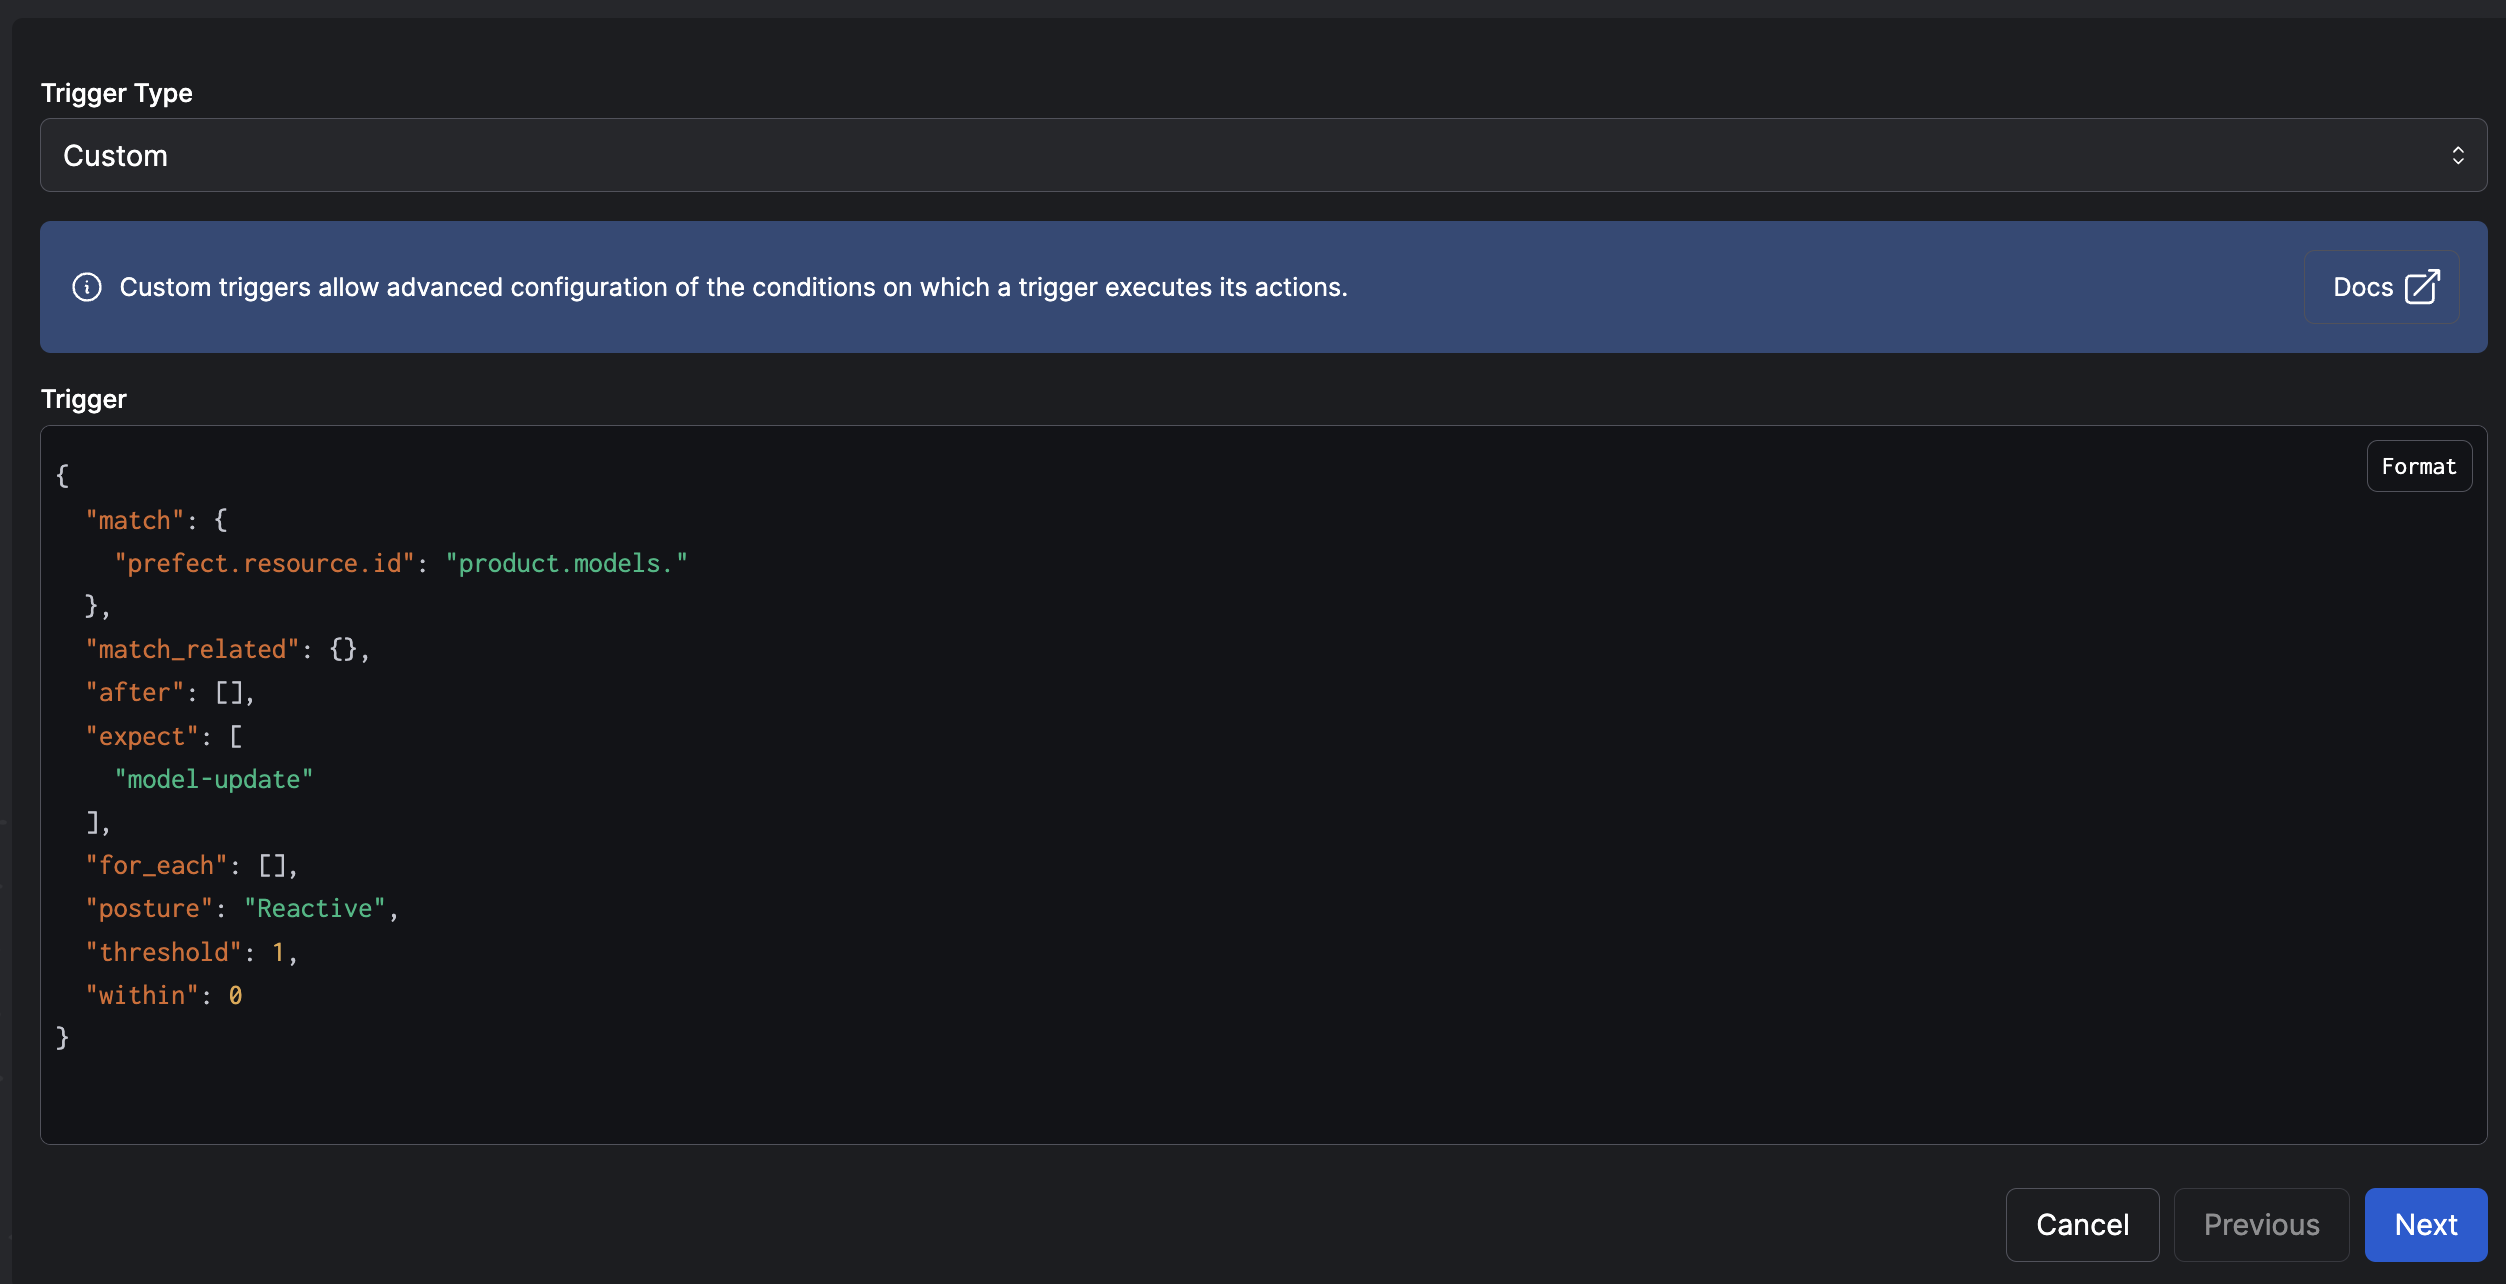
After running this function, you will see within the UI the changes that came from the post request. Keep in mind, the context will be "custom" on UI.
Let's run the underlying flow and see the deployment get kicked off after 30 seconds elapsed. This will result in a new flow run of build_names, and we are able to see this new deployment get initiated with the custom parameters we outlined above.
In a few quick changes, we are able to programmatically create an automation that deploys workflows with custom parameters.
Using an underlying .yaml file
We can extend this idea one step further by utilizing our own .yaml version of the automation, and registering that file with our UI. This simplifies the requirements of the automation by declaring it in its own .yaml file, and then registering that .yaml with the API.
Let's first start with creating the .yaml file that will house the automation requirements. Here is how it would look like:
name: Cancel long running flows
description: Cancel any flow run after an hour of execution
trigger:
  match:
    "prefect.resource.id": "prefect.flow-run.*"
  match_related: {}
  after:
    - "prefect.flow-run.Failed"
  expect:
    - "prefect.flow-run.*"
  for_each:
    - "prefect.resource.id"
  posture: "Proactive"
  threshold: 1
  within: 30
actions:
  - type: "cancel-flow-run"
We can then have a helper function that applies this YAML file with the REST API function.
import yaml

from utils import post, put

def create_or_update_automation(path: str = "automation.yaml"):
    """Create or update an automation from a local YAML file"""
    # Load the definition
    with open(path, "r") as fh:
        payload = yaml.safe_load(fh)

    # Find existing automations by name
    automations = post("/automations/filter")
    existing_automation = [a["id"] for a in automations if a["name"] == payload["name"]]
    automation_exists = len(existing_automation) > 0

    # Create or update the automation
    if automation_exists:
        print(f"Automation '{payload['name']}' already exists and will be updated")
        put(f"/automations/{existing_automation[0]}", payload=payload)
    else:
        print(f"Creating automation '{payload['name']}'")
        post("/automations/", payload=payload)

if __name__ == "__main__":
    create_or_update_automation()
You can find a complete repo with these APIs examples in this GitHub repository.
In this example, we managed to create the automation by registering the .yaml file with a helper function. This offers another experience when trying to create an automation.
Custom webhook kicking off an automation
We can use webhooks to expose the events API which allows us to extend the functionality of deployments and ways to respond to changes in our workflow through a few easy steps.
By exposing a webhook endpoint, we can kick off workflows that can trigger deployments - all from a simple event created from an HTTP request.
Lets create a webhook within the UI. Here is the webhook we can use to create these dynamic events.
{
    "event": "model-update",
    "resource": {
        "prefect.resource.id": "product.models.{{ body.model_id}}",
        "prefect.resource.name": "{{ body.friendly_name }}",
        "run_count": "{{body.run_count}}"
    }
}

Each webhook will correspond to a custom event created, where you can react to it downstream with a separate deployment or automation.
For example, we can create a curl request that sends the endpoint information such as a run count for our deployment.
curl -X POST https://api.prefect.cloud/hooks/34iV2SFke3mVa6y5Y-YUoA -d "model_id=adhoc" -d "run_count=10" -d "friendly_name=test-user-input"
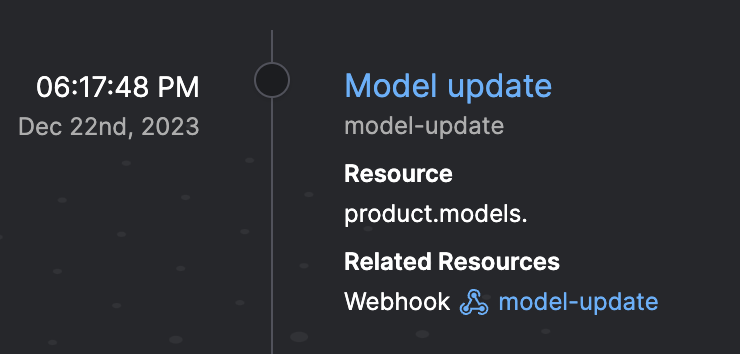
Let us go into the event feed, and we can automate straight from this event.

This allows us to create automations that respond to these webhook events. From a few clicks in the UI, we are able to associate an external process with the Prefect events API, that can enable us to trigger downstream deployments.
In the next section, we will explore event triggers that automate the kickoff of a deployment run.
Using triggers
Let's take this idea one step further, by creating a deployment that will be triggered when a flow run takes longer than expected. We can take advantage of Prefect's Marvin library that will use an LLM to classify our data. Marvin is great at embedding data science and data analysis applications within your pre-existing data engineering workflows. In this case, we can use Marvin'd AI functions to help make our dataset more information rich.
Install Marvin with pip install marvin and set you OpenAI API key as shown here
We can add a trigger to run a deployment in response to a specific event.
Let's create an example with Marvin's AI functions. We will take in a pandas DataFrame and use the AI function to analyze it.
Here is an example of pulling in that data and classifying using Marvin AI. We can help create dummy data based on classifications we have already created.
from marvin import ai_classifier
from enum import Enum
import pandas as pd

@ai_fn
def generate_synthetic_user_data(build_of_names: list[dict]) -> list:
    """
    Generate additional data for userID (numerical values with 6 digits), location, and timestamp as separate columns and append the data onto 'build_of_names'. Make userID the first column
    """

@flow
def create_fake_user_dataset(df):
  artifact_df = generate_synthetic_user_data(df)
  print(artifact_df)

  create_table_artifact(
      key="fake-user-data",
      table=artifact_df,
      description= "Dataset that is comprised of a mix of autogenerated data based on user data"
  )

if __name__ == "__main__":
    create_fake_artifact()
Let's kick off a deployment with a trigger defined in a prefect.yaml file. Let's specify what we want to trigger when the event stays in a running state for longer than 30 seconds.
# Welcome to your prefect.yaml file! You can use this file for storing and managing
# configuration for deploying your flows. We recommend committing this file to source
# control along with your flow code.

# Generic metadata about this project
name: automations-guide
prefect-version: 2.13.1

# build section allows you to manage and build docker images
build: null

# push section allows you to manage if and how this project is uploaded to remote locations
push: null

# pull section allows you to provide instructions for cloning this project in remote locations
pull:
- prefect.deployments.steps.set_working_directory:
    directory: /Users/src/prefect/Playground/marvin-extension

# the deployments section allows you to provide configuration for deploying flows
deployments:
- name: create-fake-user-dataset
  triggers:
    - enabled: true
      match:
        prefect.resource.id: "prefect.flow-run.*"
      after: "prefect.flow-run.Running",
      expect: [],
      for_each: ["prefect.resource.id"],
      parameters:
        param_1: 10
      posture: "Proactive"
  version: null
  tags: []
  description: null
  entrypoint: marvin-extension.py:create_fake_user_dataset
  parameters: {}
  work_pool:
    name: tutorial-process-pool
    work_queue_name: null
    job_variables: {}
  schedule: null
Next steps
You've seen how to create automations via the UI, REST API, and a triggers defined in a prefect.yaml deployment definition.
To learn more about events that can act as automation triggers, see the events docs. To learn more about event webhooks in particular, see the webhooks guide.